SSI Traffic Solutions: Traffic Safety Products in USA and Canada
Traffic Safety Products in USA and Canada

Selecting a Film Embossing Machine is not simply a matter of choosing the fastest model. The right system must match your film, target pattern, production volume, and quality requirements. A mismatch can cause shallow impressions, wrinkles, uneven tension, or costly material waste. Small details matter.
Market context helps explain the investment. Grand View Research estimated the global flexible packaging market at USD 268.1 billion in 2023 and projected a 4.8% compound annual growth rate from 2024 to 2030. This figure covers flexible packaging broadly, not embossing equipment alone. Still, it points to sustained demand for film-based packaging and makes production consistency an important purchasing consideration.
Before comparing machines, identify the films you actually run, including their thickness, width, and heat sensitivity. Ask suppliers for trials using your material, not just sample rolls chosen for a demonstration. Check embossing depth, pattern repeat, operating speed, web-tension control, changeover time, and maintenance access. Request measurable acceptance criteria. A polished sample is not enough.
There is no universal best machine. Sometimes the simplest option is better. Yet a lower purchase price may hide setup limits or frequent adjustments. Review technical specifications alongside test results, service support, and total operating needs. Then compare what the machine can reliably produce with what your line requires. That comparison is not always straightforward, and buyers should challenge their own assumptions before committing.
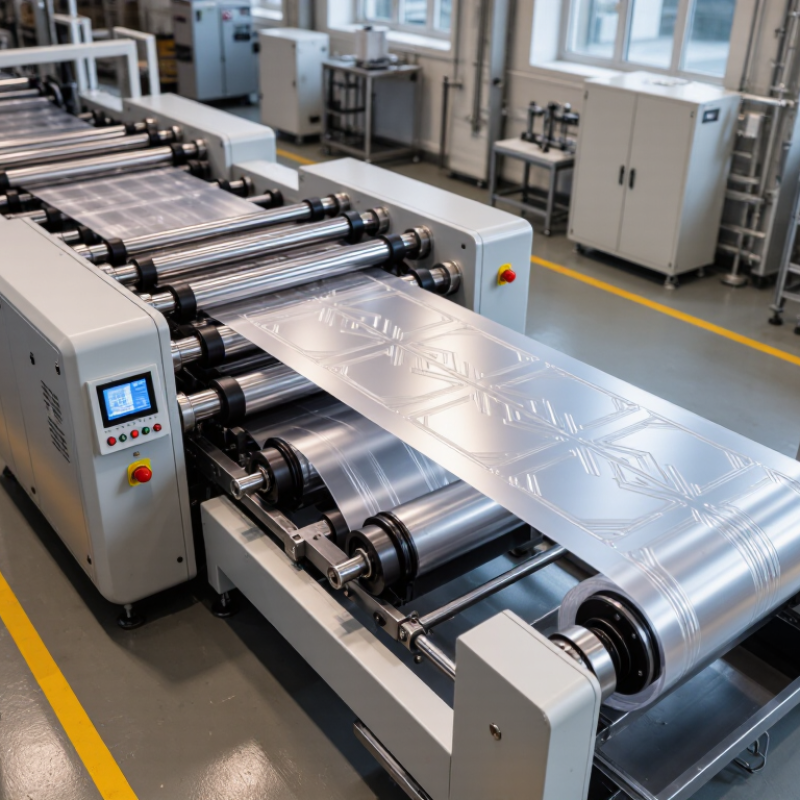
Choosing the best film embossing machine starts with knowing the material, not guessing from its appearance. Identify the polymer from reliable roll documentation or laboratory analysis; thickness alone cannot distinguish polyethylene, polypropylene, or polyester. ISO 4593 describes a mechanical scanning method for measuring plastic film and sheeting thickness. Use a calibrated instrument and follow the method’s sampling and test conditions. Measure several points across the web, since a roll may vary from edge to center. Record both the average and the spread.
Tips: Keep samples flat and free of wrinkles. Measure more than one section of the roll. A precise reading can still mislead if the sample is unrepresentative.
Once polymer and gauge are confirmed, test a sample on the machine under realistic conditions. Film gauge affects how it responds to heat, pressure, and embossing speed; polymer type also influences softening and recovery. Check whether the pattern forms clearly without thinning, tearing, or unwanted curl. Compare results across settings, and keep the sample and measurements with the trial notes. One easy mistake is treating a single thickness value as the whole story. It is not. A small gauge variation may change the finish, so verify the material again when production results drift.
Before selecting an embossing machine, learn how your film responds to pulling. ASTM D882 measures tensile properties of thin plastic sheeting under controlled conditions. Test representative samples in both machine and transverse directions, since film may behave differently across the roll. Record thickness, specimen orientation, and elongation alongside tensile strength. Small differences matter.
Do not treat tensile strength at break as a recommended operating tension. It describes failure, not a safe production setting. Use the test results to compare film lots and discuss a conservative starting range with your equipment supplier. Then increase tension gradually during a controlled trial. Watch for edge curl, stretching, wrinkles, or slipping at the rollers. Check the embossed pattern too; a clear pattern can still hide uneven strain. Real production conditions are messier than a lab test, and that deserves attention.
Tips: Keep samples clean and condition them consistently before testing. Note temperature and humidity. Start with lower web tension, then adjust in small steps while recording the results. If the film necks down or the embossing becomes inconsistent, pause and reassess rather than pushing through.
Rated web speed, measured in m/min, is a useful starting point, not a production promise. A machine rated at 80 m/min may need a lower setting with thick film or a deep pattern. That gap is normal. Film tension, embossing pressure, and frequent changeovers can also reduce stable output. Request a sustained trial using your own film. Watch edge tracking, web tension, and pattern consistency across the roll. A brief test may miss problems that appear after several minutes.
Working width, stated in mm, should match the usable width of your regular rolls. Include trim allowance and any edge zones that cannot carry the pattern. A wider machine may offer flexibility, but it can also add cost and take up floor space without improving sellable output. Measure your widest routine roll, not an unusual one. Then confirm the usable embossing width in the technical specification.
Embossing capacity needs a precise definition. Ask which film thicknesses, pattern depths, and operating speeds the machine can handle together. A maximum width or speed listed alone may not describe a practical production setup. Compare test results at your target depth and material thickness, and ask how long the run was maintained. I would not rely on one factory sample; it may not reflect your shifts, operators, or changeovers. Keep the figures realistic.
A film embossing machine is only as consistent as its engraved roller and process settings. Inspect the roller for clean edges, even engraving, and damage that could repeat across every sheet. Fine details need enough pattern depth to remain visible, but excessive depth may stretch or weaken thin film. Compare samples under angled light; shallow marks can disappear when viewed straight on. Small marks matter.
Tips: Start with a clean, flat sample. Adjust heat in °C and pressure in MPa gradually, changing one setting at a time. Record each result beside the pattern depth in µm.
There is no universal setting for every film. Material thickness, coating, and line speed all affect the result. A useful trial checks whether the pattern looks even, stays clear after cooling, and leaves the film intact. Watch for glossy patches, crushed details, or edges that curl. These are clues, not a diagnosis by themselves. I would avoid selecting a machine from maximum pressure or temperature figures alone; usable control across a practical range matters more. Repeat the test after a short production run, since a sample made at startup may not reflect stable operation.
| Target Finish | Engraved Roller Recommendation | Indicative Roller Pattern Depth (µm) | Indicative Operating Temperature (°C) | Indicative Nip Pressure (MPa) | Typical Film / Selection Check |
|---|---|---|---|---|---|
| Fine matte or microtexture | Precision-engraved, hardened steel roller; confirm engraving uniformity and surface finish. | 20–60 | 110–160 | 0.2–0.6 | PVC and other thermoplastic films. Check whether the texture remains consistent across the full web width. |
| Leather-like or medium-relief texture | Hardened steel roller with a durable engraved surface; ask for a sample roll or pattern proof. | 60–150 | 130–190 | 0.3–0.8 | Decorative PVC and selected polyolefin films. Verify that the film does not thin excessively at raised details. |
| Deep decorative pattern | Precision-engraved roller designed for the intended pattern; confirm roller runout and temperature control. | 100–250 | 140–200 | 0.4–1.0 | Films formulated for deeper forming. Test for tearing, distortion, and pattern release before specifying production settings. |
| Low-temperature embossing | Engraved steel roller paired with a controlled-heating system and suitable cooling or chill-roll capacity. | 30–120 | 80–140 | 0.2–0.7 | Heat-sensitive or lower-softening-point films. Check for sticking, shrinkage, and stable pattern transfer at line speed. |
| Shallow functional or optical texture | High-precision roller with fine engraving; request inspection data for pattern repeat and roller surface quality. | 10–50 | 90–160 | 0.1–0.5 | Thin films and fine-detail applications. Confirm that web tension and pressure control can maintain fine features without wrinkles. |
Important: These are indicative process windows for comparing equipment, not guaranteed settings. The suitable temperature and pressure depend on film resin, thickness, additives, pattern geometry, roller design, and line speed. Roller engraving depth is not necessarily the same as the finished film’s relief depth. Nip pressure in MPa is also difficult to compare between machines; ask suppliers for the pressure measurement method and the corresponding line load, commonly stated in N/mm, then validate settings with production-material trials.
How to Choose the Best Film Embossing Machine?
A clean sample at startup proves little. Registration can drift as film tension, temperature, and embossing pressure change. Check alignment at the beginning, middle, and end of a production run. Measure the distance between the printed mark and embossed detail, then record the result in millimeters. ISO 12647-2:2013 provides a framework for controlling print-process consistency, while Fogra’s ProcessStandard Offset guidance emphasizes measurable, repeatable quality checks. Use these principles to set acceptance limits before comparing machines.
Scrap rate deserves equal attention. Count rejected sheets during a sustained trial, not just during setup. For example, inspect 500 consecutive sheets and log startup waste separately from running waste. A machine that holds registration but produces blurred edges, uneven foil transfer, or crushed film may still create costly rejects. Compare samples under the same lighting, and check fine lines with a loupe. Small defects matter.
Tips: Ask suppliers to run your film and artwork at your target speed. Keep tension, temperature, and pressure settings recorded. Repeat the test after a production pause; restart quality can differ. Be cautious: one short trial cannot represent every shift, operator, or material batch. Review the machine’s registration readings, scrap counts, and finished samples together before making a decision.
Compare registration accuracy, scrap rate, and acceptable output across production runs.
Illustrative comparison only—not measured vendor or independent test results. Actual performance depends on film, tooling, speed, setup, and the registration tolerance used. Validate candidates with repeat runs on your own production materials.