SSI Traffic Solutions: Traffic Safety Products in USA and Canada
Traffic Safety Products in USA and Canada

Choosing the right delineator cones starts with the conditions they must handle. A cone that looks suitable in a warehouse may be too light for a breezy roadside or hard to see at dusk. Check the work zone’s speed environment, traffic flow, surface, visibility, and expected exposure before comparing products. Then review height, base weight, flexibility, reflective bands, and material quality. Small details matter: a broad base can sit more steadily on uneven pavement, while clean reflective bands can catch headlights on a dim, wet evening.
There is no verified expert quotation in the material provided, so inventing one or assigning it to a named professional would weaken this guide’s reliability. A useful selection principle is simple: “Match the cone to the conditions, not just the price.” Treat that as editorial guidance, not a sourced quotation. It also leaves room for judgment. A heavier cone is not automatically the best choice, and one product may not suit every site. Compare the manufacturer’s specifications with the actual setup, inspect sample cones where possible, and confirm that crews can handle and position them consistently. This guide explains how to weigh those factors and choose delineator cones with practical care.

Delineator cones are portable markers that guide people around changing hazards, work areas, and temporary route changes. Their purpose is visual, not structural. They help drivers, cyclists, and pedestrians recognize where to slow down or change direction, but they cannot stop a vehicle. That distinction matters.
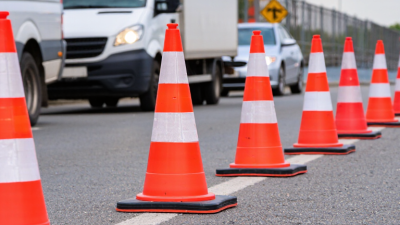
A cone’s height, color, and reflective bands affect how clearly it can be seen. In daylight, a bright body stands out against asphalt; after dark, reflective bands catch headlights. On a wet, dim road, though, glare and spray can make even a vivid cone harder to notice. Check visibility from the approach, not just from beside the cone. Small detail, big difference.
The right type also depends on placement and conditions. A broad, weighted base may stay steadier in wind, while a lighter cone is easier to move frequently. Measure the available spacing and consider how people will pass the marked area. Cones should form a clear, consistent path rather than appear as isolated warnings. It is easy to assume that more cones mean more safety, but clutter can confuse people. I would still reassess the layout after setup; traffic and weather rarely behave exactly as expected.
How to Choose the Right Delineator Cones?
Assessing the Site and Traffic Conditions
Start with the site itself. A cone that works on a quiet access road may be hard to notice beside fast-moving traffic. Walk the area during the hours when crews will be present, and note vehicle speeds, turning paths, sightlines, and available shoulder space. Check whether drivers approach over a crest or around a bend. Those details affect how early a delineator must be visible. At night or in rain, reflective bands and stable bases matter more; on a sheltered, low-speed site, lighter equipment may be easier to reposition. Small differences matter.
Consider what passes through the work zone. Delivery trucks need wider turning clearance than passenger cars, while cyclists and pedestrians may need a clearly marked route that does not narrow unexpectedly. Look for wind exposure, uneven pavement, drainage channels, and places where cones could be struck or displaced. A site visit helps, but it is not perfect. Traffic patterns can change by shift, and a wet morning may reveal hazards missed during a dry inspection. When conditions are uncertain, trial the proposed layout during a controlled setup, then check visibility from a driver’s eye level. Confirm spacing and placement against applicable local guidance and the equipment’s specifications, rather than relying on a familiar layout.
Delineator cones need to suit the surface, visibility, and handling demands of their location. Flexible PVC or polyethylene bodies tolerate knocks and are easier to move than rigid alternatives. Material performance varies, though, so check how a cone bends and recovers rather than relying on a label alone. A useful field check is to press the body gently and inspect the seams and reflective bands. Small defects matter.
Cone height affects how early drivers or pedestrians can spot a boundary. Short cones can work in compact indoor areas, while taller models are easier to see over parked vehicles or roadside clutter. Match the size to the viewing distance and surrounding objects. Reflective bands help in low light, but they cannot make a poorly placed cone visible. Keep that in mind.
The base design determines much of a cone’s stability. A broad, weighted base is less likely to tip in passing air or on uneven pavement, but it can be awkward to carry and stack. Detachable bases may simplify storage, yet loose connections can wobble after repeated use. Check that the base sits flat and does not rock. I’d still reconsider the choice after seeing the cones in their actual setting; specifications alone miss small obstacles, like a sloped curb or a narrow storage shelf.
Visibility is more than a bright color. Check whether the cone stands out against the actual background, such as gray pavement, wet leaves, or construction equipment. Reflective bands help at night, but they need a clear view of approaching headlights. Look for even, firmly attached bands rather than relying on a product photo. Small details matter. Check it outdoors.
Stability depends on the base, cone height, and conditions at the site. A broad, weighted base can resist passing air and light bumps, while a flexible body may recover after being nudged. Still, no cone is secure on every surface. Set one on the intended pavement and check for rocking. Rain, uneven ground, and vehicle airflow can change how it performs. A lightweight cone may be easier to carry, but it can be a poor fit for an exposed roadside location.
Regulatory requirements vary by location and use. Before buying, confirm the required cone height, color, reflective pattern, and placement rules with the relevant road authority or project specification. Do not assume that a cone acceptable for a private lot meets highway requirements. Keep the applicable guidance on hand for purchasing and inspections. Even a careful check can miss a site-specific detail, so verify requirements again when the work location changes.
Minimum cone heights in the U.S. MUTCD, by roadway context
What to consider: The MUTCD specifies minimum heights, not a universal base-weight requirement. Choose a stable, broad-based cone suited to site conditions; use retroreflective cones at night and check applicable state and local requirements.
Source: FHWA Manual on Uniform Traffic Control Devices (MUTCD), 11th Edition, Section 6F.64. Confirm the edition adopted by your jurisdiction.
Estimate cone quantities from the full traffic-control layout, not just the work area. Count devices for the approach taper, buffer, work zone, and downstream taper, using the spacing required by the approved plan. The FHWA’s 11th Edition MUTCD provides taper-length methods that account for factors such as speed and lane shift. Divide each segment by its planned spacing, then add a practical reserve for damaged or displaced cones. A tidy takeoff can still miss a driveway, curve, or delivery entrance.
Place cones where drivers can see a clear, continuous path—not merely where the drawing looks balanced. Check sight lines from a seated driver’s view, especially near crests, bends, and dusk transitions. Recheck the layout after setup and whenever work limits or traffic patterns change. Small gaps matter.
Maintenance needs a named person and a simple inspection log. Record time, location, missing or dirty cones, and corrective action; check again after impacts, strong winds, or each shift change. FHWA’s Work Zone Facts and Statistics reports 891 work-zone crash deaths in 2022. That figure does not measure cone effectiveness, but it reinforces why reliable visibility and prompt replacement deserve attention. Some sites will need more frequent checks than the schedule suggests.
Use these figures as planning examples, not as regulatory requirements. Cone dimensions, spacing, visibility treatments, and placement must follow applicable local rules and the conditions of the site. For quantity estimates, a straight run is calculated as ceiling(run length ÷ spacing) + 1; add cones for tapers, transitions, intersections, and replacements.
| Planning situation | Cone size to consider | Illustrative spacing | Estimated quantity per 100 ft (30.5 m) straight run | Placement and maintenance plan |
|---|---|---|---|---|
| Indoor or private-property guidance Guiding pedestrians or marking a low-speed area |
18 in (46 cm) may suit controlled, low-speed settings when permitted and visible. | About 10–15 ft (3–4.6 m), adjusted for sight lines and pedestrian flow. | 8–11 cones | Keep a clear, continuous path and avoid blocking accessible routes or exits. Check that cones are upright and visible from approaching directions. |
| Parking aisle or service area Separating vehicles from a temporary work area |
28 in (71 cm) is a practical visibility-oriented planning option; confirm site requirements. | About 15 ft (4.6 m) for a clearly defined line. | 8 cones | Place cones before the hazard and continue beyond its edge where needed. Reposition any cone displaced by vehicles or wind. |
| Low-speed roadside work Marking a short work area on a local street |
Typically consider 28 in (71 cm) or taller where required by the governing rules and site conditions. | About 20 ft (6.1 m) for this illustrative calculation. | 6 cones | Provide a suitable advance warning and transition area. Keep cones out of the traveled path unless the traffic-control plan calls for that placement. |
| Higher-speed or high-exposure location Roadside work with greater approach speed or limited visibility |
Use the size, reflective treatment, and other features specified by the approved traffic-control plan. | About 30 ft (9.1 m) for this illustrative calculation only; actual spacing may differ substantially. | 5 cones | Do not use this example to set field spacing. Follow applicable standards and the approved plan, including requirements for tapers, advance warning, and nighttime visibility. |
| Taper or lane transition Directing traffic gradually around a closure or work zone |
Match the size and visibility requirements of the road, traffic-control plan, and local regulations. | Set spacing using the applicable standard or approved plan; do not estimate from the straight-run examples alone. | Calculate from the specified taper length and spacing, then add the transition and buffer-area needs. | Lay out the taper consistently and inspect it from the approaching direction. A trained traffic-control professional should determine placement where required. |
| Quantity reserve Allowing for losses, damage, and layout changes |
Keep spare cones matching the deployed size and visibility features. | Not applicable. | Add about 5–10% as a planning reserve; increase it for rough, windy, or frequently changed sites. | Store spares upright and clean. The reserve is an inventory allowance, not a substitute for the quantity required by the traffic-control plan. |
| Pre-deployment inspection Before each setup or shift |
Confirm the correct size and required reflective or fluorescent features are present. | Inspect every cone before placement. | Replace damaged units before calculating the usable count. | Look for cracks, split bases, missing or peeling reflective bands, dirt, fading, and instability. Remove cones that cannot stand securely or be seen clearly. |
| During-use checks Active work periods and changing conditions |
Keep cones upright, clean, and conspicuous throughout use. | Recheck after traffic contact, strong wind, rain, layout changes, or reduced visibility. | Keep replacement cones accessible near the work area, stored safely outside active traffic. | Restore the intended layout promptly when cones are moved. Increase inspection frequency when visibility or weather conditions worsen. |
| Post-use care and storage After the work zone is removed |
Separate serviceable cones from units needing repair or disposal. | Clean and inspect before storage. | Update inventory after each deployment and replace unusable cones. | Remove dirt using the manufacturer’s care guidance, allow cones to dry, and store them in a stable stack or rack away from damaging heat, sunlight, and chemicals. |